Brand colors are set once at Settings → Outputs → Branding and reused in every visual. A layer that uses a brand color is linked to it: change the color later and every linked layer follows. Setting up the colors themselves is on Set up your station branding.

Apply a brand color to a layer

The text, fill, border, Lottie and text style color controls in the Visual Designer open with Brand colors on top. The five brand colors come first, then your own colors. Hover a swatch to see its name and hex value. Click a swatch to link the layer to that color. The control then shows the color’s name instead of a hex value, with a link icon on text, fill and border. When the station has no branding yet, the picker shows Set brand colors, a link to the Branding page.
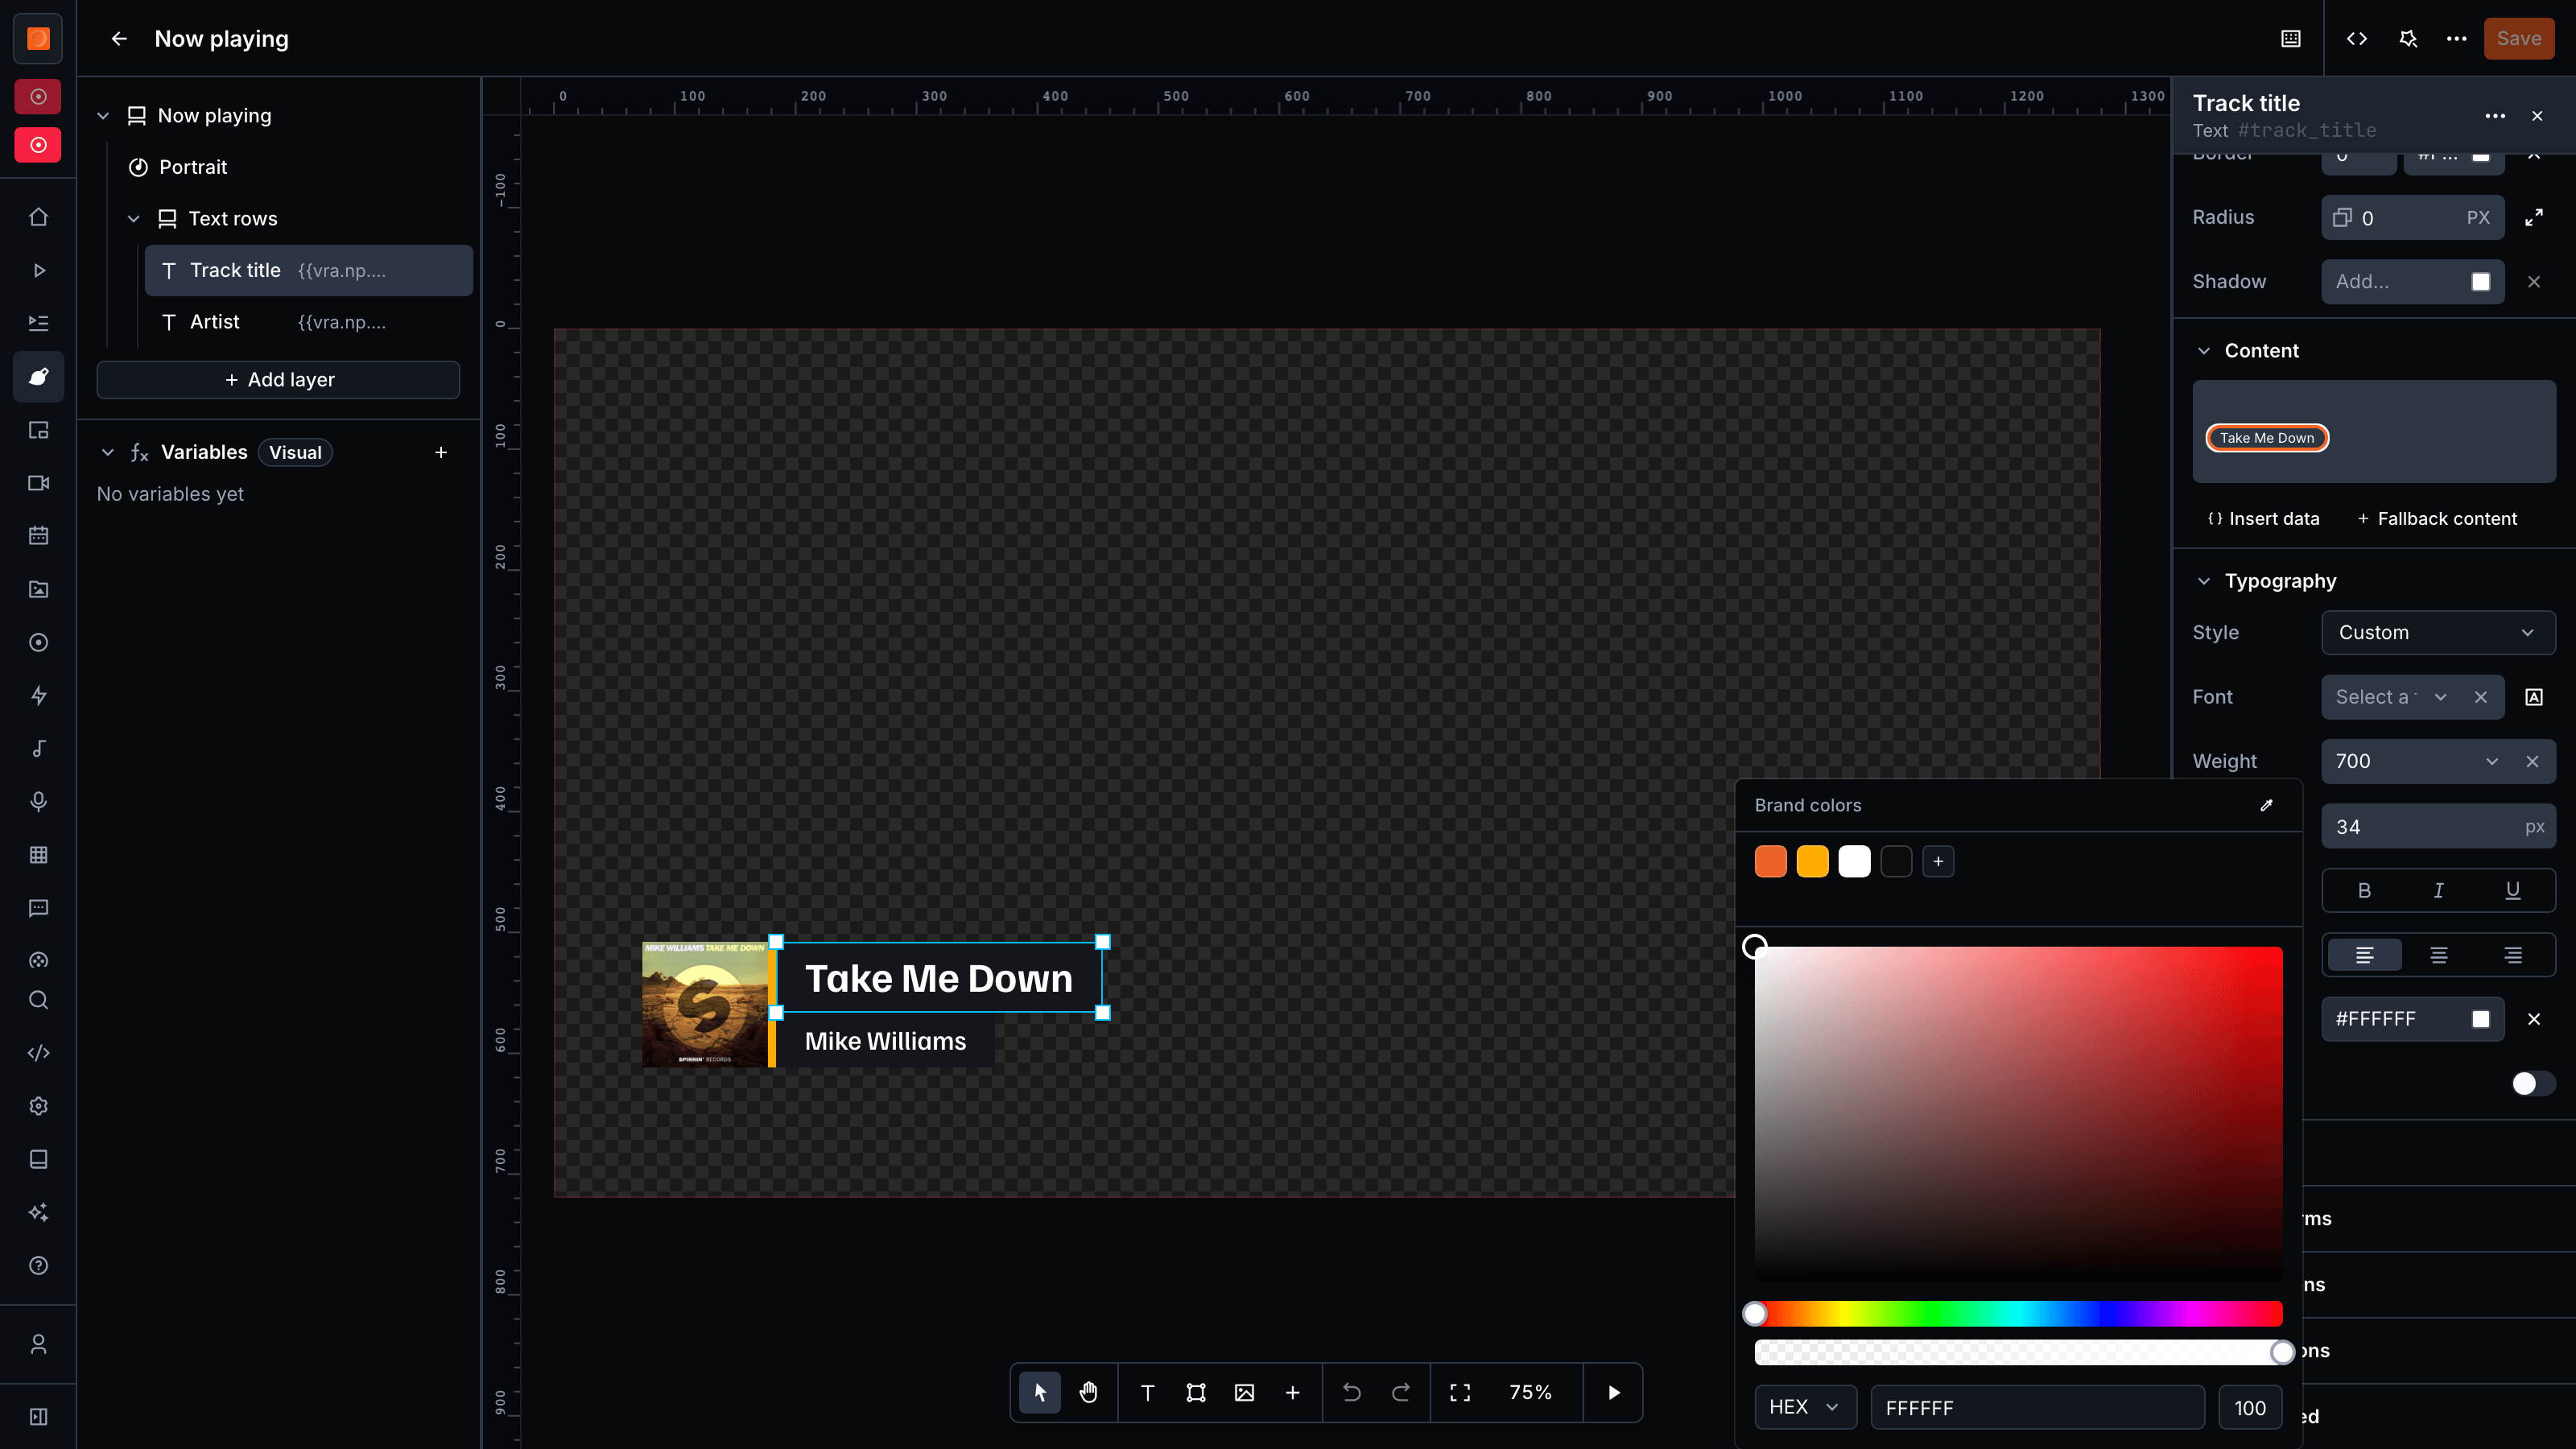
Add a brand color from the Visual Designer

Click + at the end of the swatch row. Type a name, pick the color and click Create. The new color is linked to the layer and shows up in Branding under More colors.

Edit a brand color from the Visual Designer

Right-click one of your own colors and choose Edit, or double-click it. The picker now changes that color for every layer that uses it. Rename it in the same row and click Done when finished. The five brand colors from the Colors section are edited at Settings → Outputs → Branding only. Pick a different color by hand, or with the eyedropper, and that one layer stops following the brand color. Clearing the color with × unlinks it too. The brand color and every other layer stay as they were.

Delete a brand color

Right-click one of your own colors and choose Delete, or delete it under More colors in Branding. Linked layers keep the last value and stop following the color. The five brand colors can’t be deleted.